How do I add a link or a button natively in a Webflow tabs?
After several searches on the web and no solution I explain to you how to easily add a button in the content of your Tabs on Webflow.
Due to a technical limitation of Webflow on Tabs elements, it is impossible for us to add a button/link in the content. This can be very disadvantageous when we want to present content that must redirect to internal or external pages.
What is a Tabs component in Webflow?
The component Tabs in Webflow is an interactive element designed to organize and present content in a structured and dynamic way. It allows you to divide extensive information into distinct sections, accessible via clickable tabs, thus offering a smooth and intuitive user experience.
Composition of a Tabs component
A Tabs component is generally composed of two main parts:
1. Tab Menu : This is the bar containing the various tabs, each representing a section of content. Users can click on a tab to view related content.
2. Tab Content : This is the area where the content corresponding to each tab is displayed. Only one tab content is visible at a time, depending on which tab is active.
Use cases for Tabs on Webflow
The Tabs component is particularly useful in the following scenarios:
• Complex content organization : Ideal for pages that contain repetitive sections or categorized information, such as FAQs, product sheets, or service details.
• Comparisons : Tabs allow you to compare different options or characteristics on the same space without requiring a large scroll.
• Optimization of space : By limiting visible content to only one tab at a time, Tabs allow for a clear and concise presentation, especially on restricted layouts.
In summary, the Tabs component is an essential tool in Webflow to structure content effectively and provide a better user experience.
The most restrictive limit of Webflow Tabs in my opinion
One of the notable limitations of Tabs in Webflow is the impossibility of adding a link or a clickable button directly in a Tabs Pane (content of the tab). Since the Tabs Pane is a link in itself, it is therefore not possible to embed a link in a link. This constraint can complicate customization and limit some expected functionalities, especially for conversion-oriented designs.
The consequences of this technical limitation
1. Restricted browsing : You cannot direct users to another page or section directly from a Tabs Pane, which reduces flexibility for more interactive designs.
2. User experience issues : Users may be confused if a button or link seems visually functional but does not respond properly to their click.
3. Difficulties with calls to action (CTA) : If you want to add a CTA directly to a Tabs Pane, such as “Learn more” or “Add to cart”, you will have to go through alternative solutions.
How do you get around this problem very simply?
Add a button that is not a button
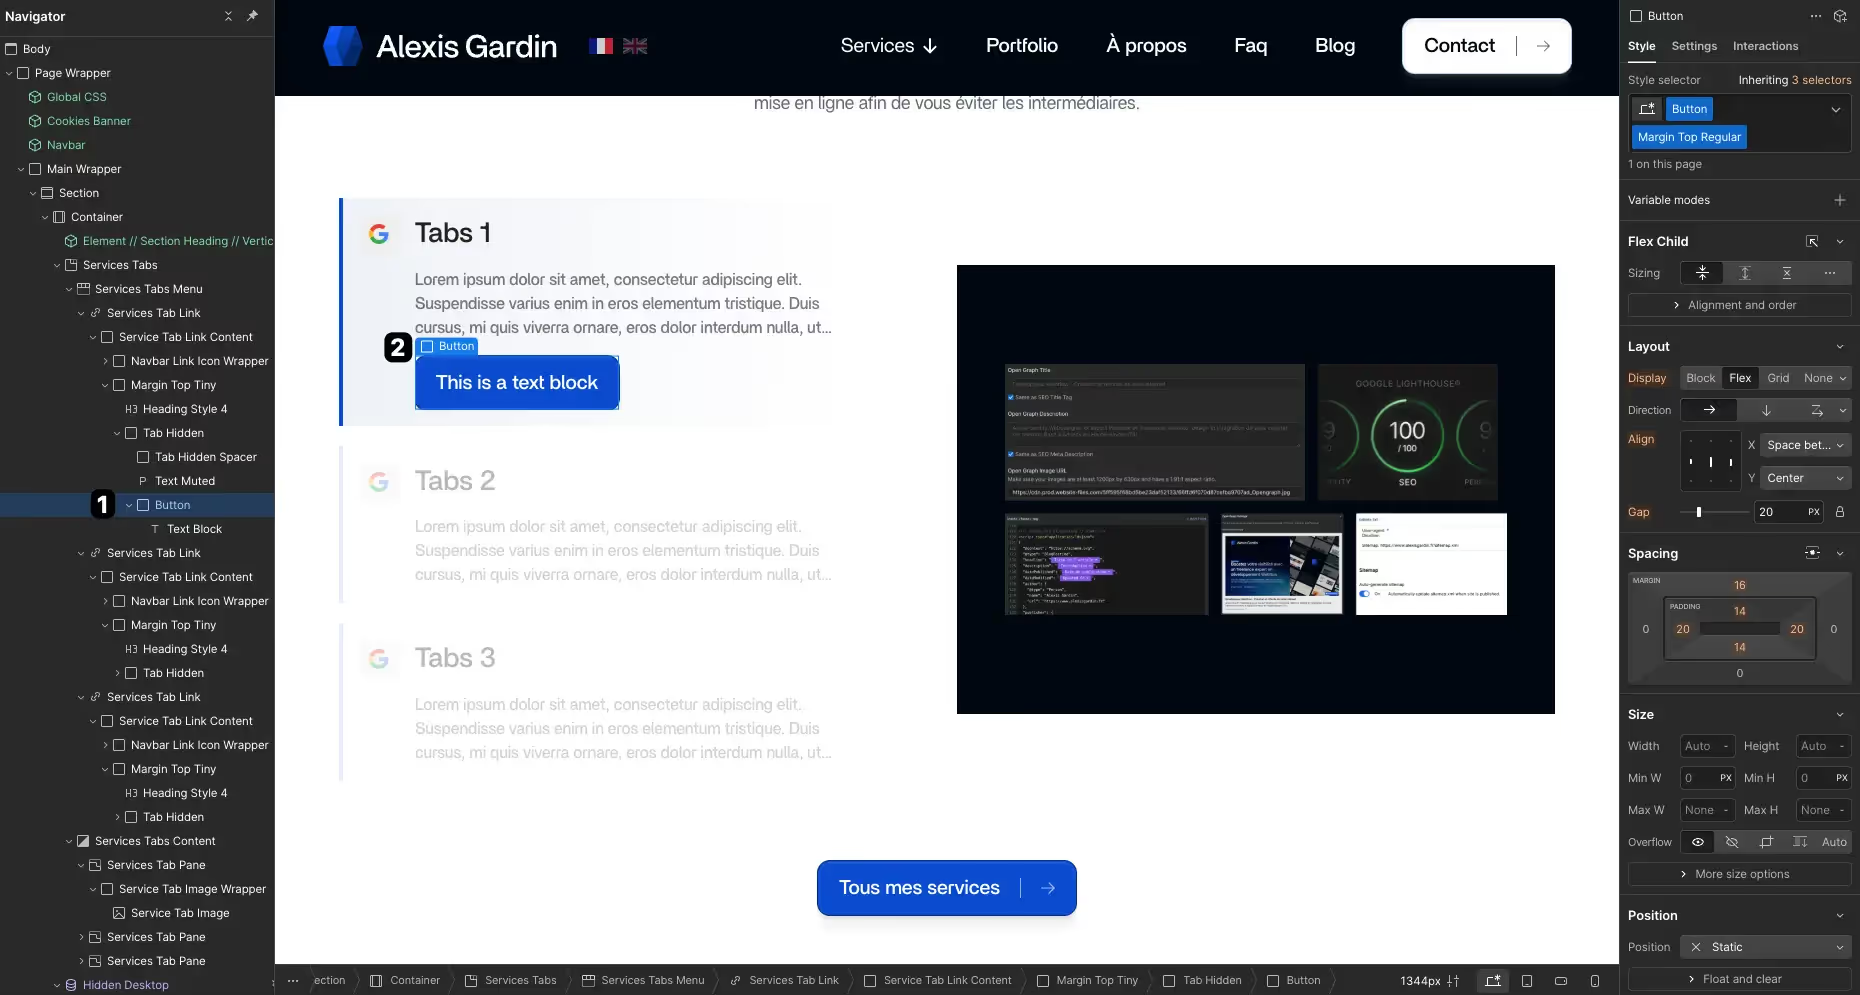
Once your tabs are created and stylized, if you try to add a button in its content, you will come across this alert: Link can't be placed in a Tab Link.
The first step is therefore to instead add a div with a text inside and then give it the class that you usually assign to your CTAs:

It may also be interesting to add the cursor:pointer class to this CSS class.
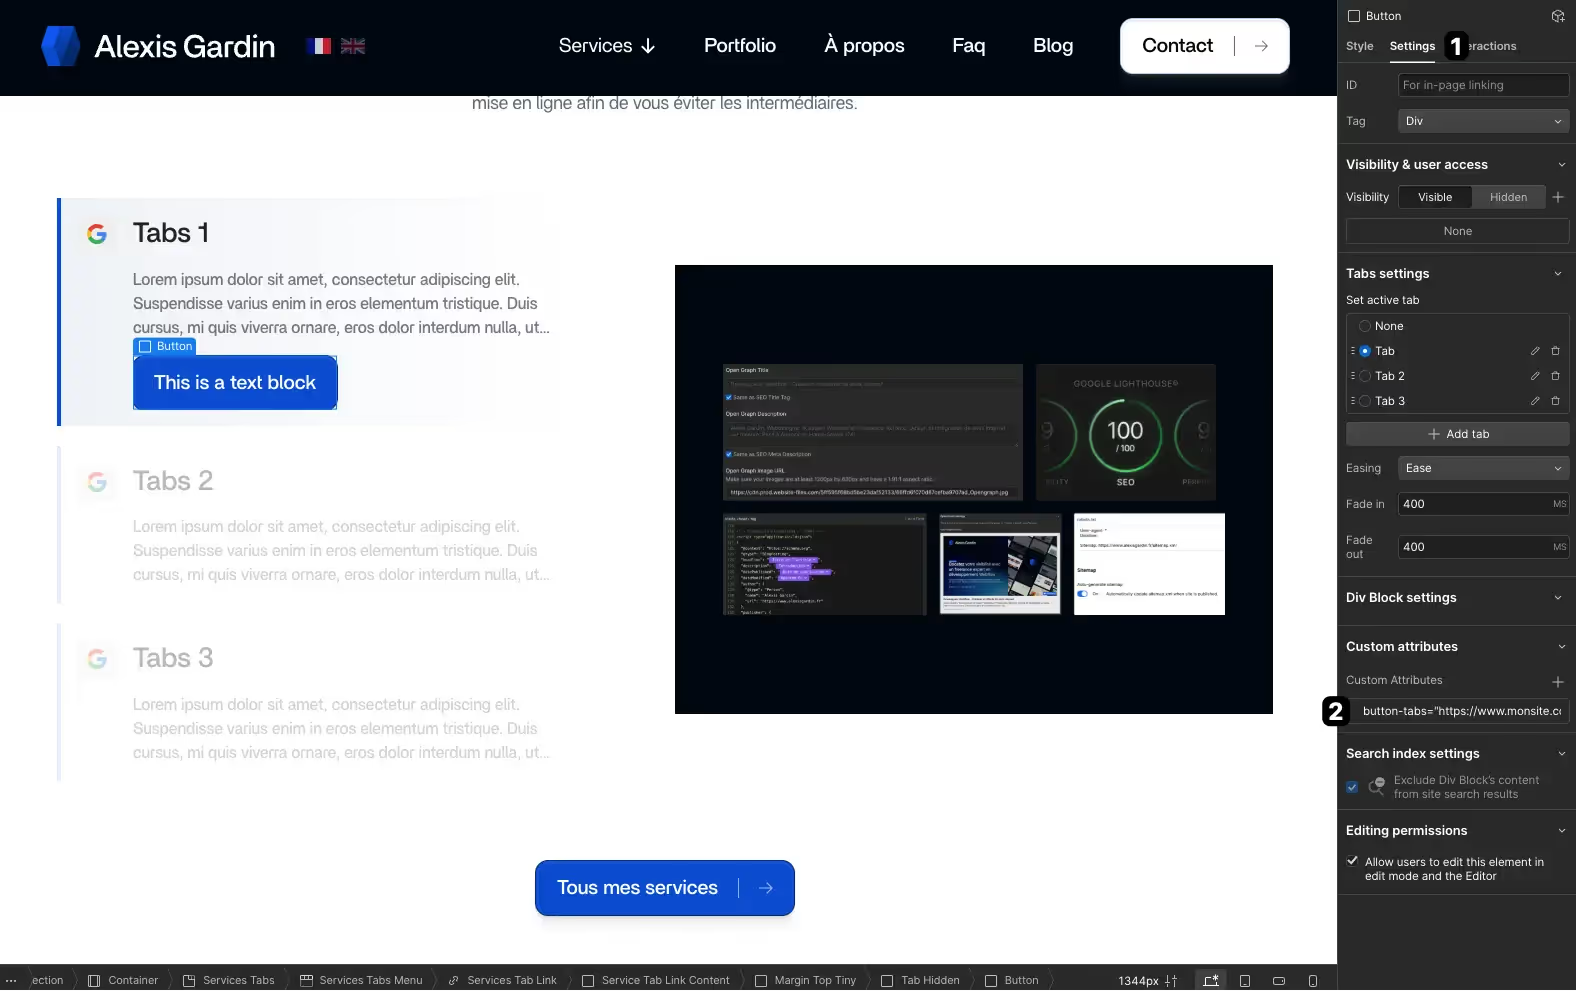
Add a custom attribute
1. Select your Div in Webflow.
2. Go in the settings panel (Settings).
3. Add this custom attribute:
• Name : button-tabs
• Value : The destination URL, for example: https://www.monsite.com/page-de-destination.

Insert custom script
Last step, you will simply need to add the following script to the custom code of your project or page:
<script>
document.querySelectorAll ('[button-tabs]') .forEach (div => {
div.addEventListener ('click', () => {
const url = div.getAttribute ('button-tabs');
if (url) {
window.location.href = url;
}
});
});
</script>
Remember to always test your changes on multiple devices and resolutions to ensure optimal results and to anticipate possible problems. With these solutions, your Tabs will become a powerful asset for organizing content while maximizing user engagement.
It's up to you to play!
Explore my latest posts
Take a few minutes to read the latest articles on my blog and learn about the latest news and trends in the world of Webdesign and No-code.


